Saturday, January 17, 2015
I wrote a clock!
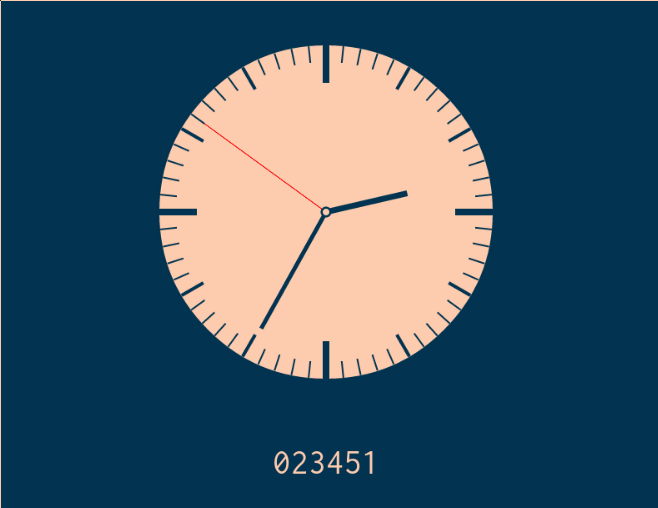
So, I wrote a clock.
I based it on an analogue clock I had written for a tomato timer app (still working on that), but I added a color variation by the time, to make it cleaner.
Writing the clock itself was just an exercise in Canvas, and the source code is all up there for everyone to browse. The hardest part to write was probably the color selection function, but it's tricky to make a function that's smooth, but also visually pleasing. I don't know if I've hit on a great one, but I think this one looks alright. It varies the red color based on the hour, the green based on the minutes and the blue based on the seconds, though it tweens a lot so that the transition is more smooth. I hope you like it!
Hy flow macros.
While working on my new web framework Horn, written in Hy of course, I found myself lacking some flow controls. So I just wrote some macros!
As you can see, switch is basically just a guard statement, but with the original variable playing a role in every comparison, and with an additional else clause (since guard can only do that with a True).
It's amazing how powerful macros are, and I'm really starting to like what I can do with them. I've already submitted these to hy.contrib, and I hope they get accepted. Try some Hy!
;; Additional flow macros

(defmacro/g! guard [&rest args]
  (setv g!cond (car args))
  (setv g!body (car (cdr args)))
  (setv g!rest (cdr (cdr args)))
  (if g!rest
  `(if ~g!cond
       ~g!body
       (guard ~@g!rest))
  `(if ~g!cond
       ~g!body)))

(defmacro/g! switch [variable &rest args]
  (setv g!comp (car args))
  (setv g!body (car (cdr args)))
  (setv g!rest (cdr (cdr args)))
  (setv g!cond `(~(car g!comp) ~variable ~@(cdr g!comp)))
  (if g!rest
      (if (cdr g!rest)
        `(if ~g!cond ~g!body (switch ~variable ~@g!rest))
        `(if  ~g!cond ~g!body ~@g!rest))
      `(if  ~g!cond ~g!body)))
As you can see, switch is basically just a guard statement, but with the original variable playing a role in every comparison, and with an additional else clause (since guard can only do that with a True).
It's amazing how powerful macros are, and I'm really starting to like what I can do with them. I've already submitted these to hy.contrib, and I hope they get accepted. Try some Hy!
Tuesday, January 13, 2015
Framed theorems in Latex
I just added framed theorems to my Latex repertoire.
I've been using amsthm for marking theorems for a long time, but since I encountered notes that had colored frames around the theorems, I decided that I'd add them to my latex header file. The part of the header file that relates to theorems is now is thus:
(All my notes are in Icelandic, of course, This allows me to mark my theorems, my definitions, remarks and examples specially in the TeX, and to spot them easily, which is a lot of help when using the notes in open book exams.
First I tried using mdtheorem and newmdtheoremenv, but neihter would give me what I want (couldn't get it to be unnumbered without ntheorem, and that messed up the amsthm,... etc), so the ultimate solution was just to not use the built in features of mdtheorem, and just saying directly what I wanted (a colored box around my theorems). I hope this is useful to others.
\usepackage{amsthm}
\usepackage[framemethod=tikz]{mdframed}
\renewcommand{\qedsymbol}{\textbf{Q.E.D}}

\mdfdefinestyle{theoremstyle}{%
roundcorner=5pt, % round corners, makes it friendlier
leftmargin=1pt, rightmargin=1pt, % this helps with box warnings
hidealllines=true, % even friendlier
align = center, %
}

\theoremstyle{plain}
\newtheorem*{setn}{Setning}
\newtheorem*{hsetn}{Hjálparsetning}

\theoremstyle{definition}
\newtheorem*{skgr}{Skilgreining}
\newtheorem*{daemi}{Dæmi}
\newtheorem*{frumsenda}{Frumsenda}
\newtheorem*{lausn}{Lausn}


\theoremstyle{remark}
\newtheorem*{ath}{Athugasemd}
\newtheorem*{innsk}{Innskot}

\surroundwithmdframed[style=theoremstyle,backgroundcolor = green!20]{skgr}
\surroundwithmdframed[style=theoremstyle,backgroundcolor=blue!10]{setn}
\surroundwithmdframed[style=theoremstyle,backgroundcolor = orange!20]{daemi}
\surroundwithmdframed[style=theoremstyle,backgroundcolor = red!20]{ath}
(All my notes are in Icelandic, of course, This allows me to mark my theorems, my definitions, remarks and examples specially in the TeX, and to spot them easily, which is a lot of help when using the notes in open book exams.
First I tried using mdtheorem and newmdtheoremenv, but neihter would give me what I want (couldn't get it to be unnumbered without ntheorem, and that messed up the amsthm,... etc), so the ultimate solution was just to not use the built in features of mdtheorem, and just saying directly what I wanted (a colored box around my theorems). I hope this is useful to others.
Sunday, December 21, 2014
Proper tail recursion in Python and Hy
I recently came across a new language, Hy. It is a Lisp dialect of Python!
This means that I can finally start programming as I want in a functional language, Lisp, and not have to worry about whether others can use my code or whether I hit a snag that I can't figure out in lisp, as I can always drop back down to Python if necessary.
Anyways, since it is a Lisp dialect, I wished that it had proper tail recursion, as I utilize tail recursion a lot when programming in Lisp, and hitting a maximum recursion depth exception is quite common for me. As proper tail recursion is missing in Python, I first had to implement tail recursion in Python . I did this using a decorator and an exception, which allows me to bail out of a function without returning anything, and the decorator tries to return from the function and catches these TailCall exceptions, and handles them so that it all works. This is probably a lot slower way of doing it than having it implemented in the interpreter itself, but seeing as you gain instead power to go much deeper in recursion, I think it is a fair trade-off.
The next step was implementing the decorator and exception in Hy. The tail recursion decorator and exception in Hy is a bit awkward, but works well enough.
The final step was implementing it in Hy itself, and I now have a pending pull request for the change. The implementation adds a new import,
This allows us to do things like:
Here's hoping that it makes it into Hy!
Anyways, since it is a Lisp dialect, I wished that it had proper tail recursion, as I utilize tail recursion a lot when programming in Lisp, and hitting a maximum recursion depth exception is quite common for me. As proper tail recursion is missing in Python, I first had to implement tail recursion in Python . I did this using a decorator and an exception, which allows me to bail out of a function without returning anything, and the decorator tries to return from the function and catches these TailCall exceptions, and handles them so that it all works. This is probably a lot slower way of doing it than having it implemented in the interpreter itself, but seeing as you gain instead power to go much deeper in recursion, I think it is a fair trade-off.
The next step was implementing the decorator and exception in Hy. The tail recursion decorator and exception in Hy is a bit awkward, but works well enough.
The final step was implementing it in Hy itself, and I now have a pending pull request for the change. The implementation adds a new import,
(import [__future__ [TailRec]])
This allows us to do things like:
    (defn tcodd [n]
      (if (= n 0)
          False
          (tceven (- n 1))))
    (defn tceven [n]
      (if (= n 0)
          True
          (tcodd (- n 1))))

    (print (tceven 1000))
(defn fact [n]
  (defn facthelper [n acc]
    (if (= n 0)
        acc
        (facthelper (- n 1) (* n acc))))
    (facthelper n 1))
(print (fact 1000))
Here's hoping that it makes it into Hy!
Saturday, December 06, 2014
Hy <-> Python Interop
I added Hy <-> Python Interop documentation to the Hy documentation today! Best part of open source is that if you find something missing, you can just add it!
If you save the following in greetings.hy:
Then you can use it directly from python, by importing hy before importing
the module. In Python:
You can also declare a function in python (or even a class!) and use it in Hy!
If you save the following in greetings.py in Python:
You can use it in Hy:
To use keyword arguments, you can use in greetings.py:
Which would output:
Simple as that! Now keep on the Hy life!
Hy <-> Python interop
By importing Hy, you can use Hy directly from Python!If you save the following in greetings.hy:
(defn greet [name] (print "hello from hy," name))
import hy
import greetings

greetings.greet("Foo")
If you save the following in greetings.py in Python:
def greet(name):
    print("hello, %s" % (name))
(import greetings)
(.greet greetings "foo")
def greet(name, title="Sir"):
    print("Greetings, %s %s" % (title,name))
and then in Hy:
(import greetings)
(.greet greetings "Foo")
(.greet greetings "Foo" "Darth")
(apply (. greetings greet) ["Foo"] {"title" "Lord"})
Greetings, Sir Foo

Greetings, Darth Foo

Greetings, Lord Foo
Saturday, February 15, 2014
A neat little result.
While going over some homework as a TA in computer science 2 at the University of Iceland, I noticed something I did not know.
We already know that (assuming integer division) that
\[\left( \frac{x}{{10}^i} \right) \mod 10 \]
gives us the \((n-i)\)-th digit of a number (\(n =\left\lfloor{\log_{10}(x)} \right\rfloor \), and \( i = 0 \) gives you the last digit) when counting in a decimal system. But going over the homework batch where the students were supposed to implement radix sort, I noticed that
\[ \frac{x \mod {10}^{i+1}}{{10}^i} \]
gives you the \(i\)-th digit (where 0 gives you the first)! Pretty cool!
I'm not going to prove this, as I have far to little experience with integer division and the modulus operation, but it seems to work, judging by that my students queues all turn out sorted.
Thursday, November 21, 2013
Orbital Mechanics
This past few weeks I've been working on a game in Computer Game Programming, Jerbal Space Program.
You design a space ship, and then you fly around in it, trying to land on the moon, or what have you. It's a pretty open sandbox game.
During it's development, I had to dive into orbital mechanics, to figure out the orbit of the spaceship, and then to render that orbit.
I though it was pretty neat, but it was hard to figure out from wikipedia, so I thought I'd write a post about it.
Lets dive into the function:
Now, using this we can plot our ellipse, knowing the center, and the angle of it. And it works, just zoom far enough out in the game, and take off! Happy flying!
You design a space ship, and then you fly around in it, trying to land on the moon, or what have you. It's a pretty open sandbox game.
During it's development, I had to dive into orbital mechanics, to figure out the orbit of the spaceship, and then to render that orbit.
I though it was pretty neat, but it was hard to figure out from wikipedia, so I thought I'd write a post about it.
Lets dive into the function:
Ship.prototype.updateOrbit = function() {
    //Calculate orbit from orbital state vectors
    //Get the primary body the ship is orbiting
    var terr = entityManager.getTerrain(this.cx,this.cy);

    //One focus is in the center of the primary body
    var focus = terr.center;
    var M = terr.mass;

    //Mu in the equations
    var mu = consts.G*(M+this.mass)

    //The posistion and velocity vectors.
    //Note that posistion is relative to the focus,
    //But the velocity is just the current velocity of the ship
    var r = util.vecMinus(this.center,focus)
    var v = [this.velX,this.velY];

    //Calculate the orbit specific energy, and from that we find the
    //semi-major axis. Note that this makes sense, as the semi major axis
    //basically tells us how high we'll go.
    var speed = this.getSpeed();
    var eng = (speed*speed)/2 - (mu/util.lengthOfVector(r));
    var a = -mu/(2*eng);

    //Calculate the eccentricity vector, and from that the eccentricity
    var tripleprod = util.tripleProduct(v,r,v);
    var vtimeshovermu = util.mulVecByScalar(1/mu,tripleprod);
    var unitr = util.normalizeVector(r)
    var eccVec = util.vecMinus(vtimeshovermu,unitr);
    var ecc = util.lengthOfVector(eccVec);

    //ae is the distance from the center to a;
    var ae = a*ecc;
    //semi minor axis

    var b = a*Math.sqrt(1-ecc*ecc);
    //Find the center from the distance
    var cen = [f[0]-ae,f[1]];

    //Here we find the rotation of the eccentricity,
    //which tells us where the orbit is from the focus
    var angl = util.angleOfVector(eccVec);

    //rotate the center around the focus according to the angle
    cen = util.rotatePointAroundPoint(cen,angl,focus[0],focus[1]);

    //Set the properties of the orbit
    this.orbit = [cen[0], cen[1],a,b,angl,focus[0],focus[1]];
}
Now, using this we can plot our ellipse, knowing the center, and the angle of it. And it works, just zoom far enough out in the game, and take off! Happy flying!
Subscribe to:
Posts (Atom)